Glam

Showing posts with label Tutorial. Show all posts

Thursday, 1 May 2014

Beautiful Movements Cosmetics | A Review

, , , , , , , , .
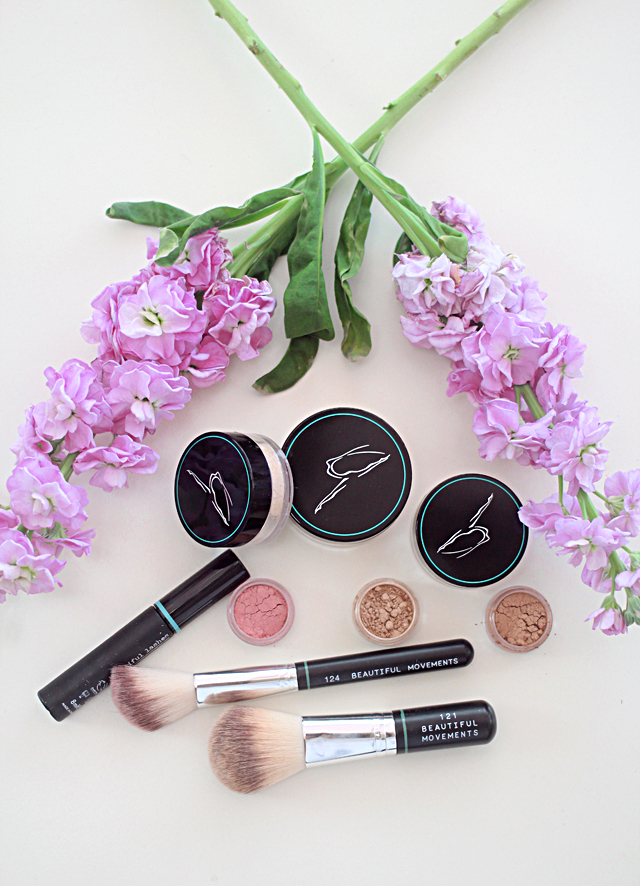
Beautiful Movements boast a range of complete mineral makeup, from blushers and bronzers through to concealers and foundations you can create multiple, versatile looks with the many products available.

Since I began my journey to ‘better skin’ I’ve stopped reaching for my heavier, liquid foundations and embraced a softer, more natural look - which is something I never thought would happen. The fact that I haven’t worn my Esteé Lauder Double Wear since last year still shocks me.

Where Beautiful Movements differ from other brands is their background. Firstly they’re cruelty free, BUAC and PETA approved as well as being free from parabens, synthetic dyes and fragrances. If that wasn’t impressive enough they also contain zinc oxide, a natural anti-inflammatory, which is hugely beneficial for spot prone skin: hence me falling head over heels for it. 

THE PRODUCTS:
I tend to go for a natural – ‘my skin, but better’ finish, however this is totally buildable without clogging the pores and feeling heavy on the skin. The and give a lovely, healthy glow to the skin whilst the makes your eyes pop, but with a completely natural look. The is lightweight, separating and lengthening the lashes beautifully without being cakey or flaking, leaving those nasty black smudges under your eyes.
The has to be one of my absolute favourites from the range – it has the most incredible coverage using the tiniest amount. They’ve also opted for synthetic, super soft to keep in check with the cruelty free stamp and they buff the makeup in perfectly. Lastly, the helps to keep everything firmly in place, whilst giving a healthy glow with a flawless finish. 
The entire range is totally affordable, with the most expensive item being the foundation at £14, it's the perfect, penny friendly way to introduce mineral makeup in to your routine.

There’s not much else to say, apart from I am completely and utterly bowled over by this brands greatness. Kimberley Wyatt is an asset to the beauty world and I wish her all the success in the world with this incredible range –  I truly hope more and more people fall in love with it, like I have. 

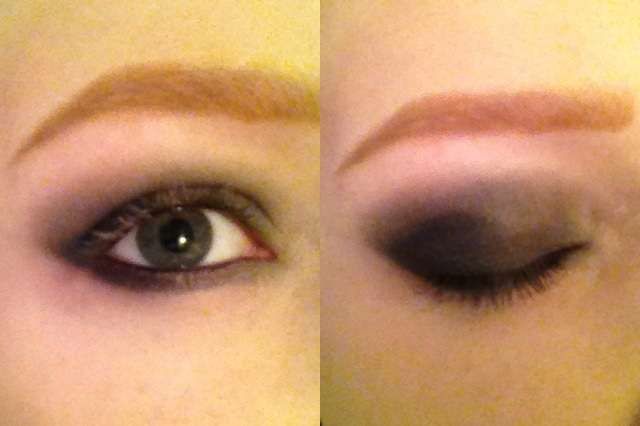
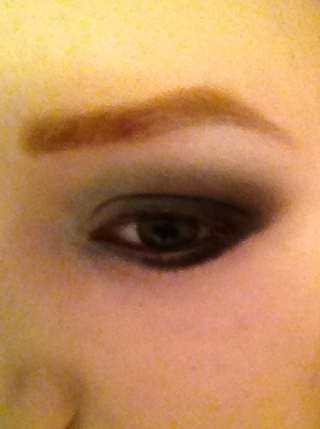
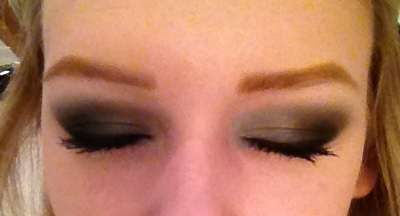
I filmed a tutorial using all of the products on my YouTube channel, if you want to see the products in action :) however, here’s the finished look – you know, if you’re too lazy ;)


Friday, 30 August 2013

My Daily Make-Up Routine #2 | Video

What I'm Wearing: TOP: Urban Outfitters. NECKLACE: Kirsteen Stewart
Hello my lovelies. I thought it was about time I filmed an updated daily make-up routine for my YouTube channel. Let me tell you there is nothing more daunting than posting your naked face on the internet, especially when you feel super self conscious about parts of it. But, we are all friends (I hope) and I get asked on a regular basis what I do or what products I use so what better way than show you from scratch. Also - we all have to get over our fears at some point huh? I know there will probably be a few nasties but I always feel lucky to have the lovely people that are so positive and caring, so thank you for being fabulous! I've listed all the products I've used below, so if you don't fancy watching the video you don't have to! 

I hope you enjoy it. Much love, xxx


PRODUCTS USED:
Bobbi Brown Hydrating Eye Cream: http://rstyle.me/n/bn2p2sh6w
Witch Anti-Blemish Primer: http://tinyurl.com/ojdfc4h
Bobbi Brown Corrector: http://rstyle.me/n/bn2qbsh6w
Real Techniques Deluxe Crease Brush: http://tinyurl.com/cbqjftu
Illamasqua Skin Base Foundation SB04:http://rstyle.me/n/bn2qhsh6w
Dior Light Foundation Brush - Backstage Brushes:http://tinyurl.com/prvy8vd
Collection Lasting Perfection Concealer - Light:http://tinyurl.com/orfbq3u
Real Techniques Expert Face Brush: http://tinyurl.com/psjn4gl
MAC Studio Fix Powder NC20: http://tinyurl.com/oqxcsth
Real Techniques Powder Brush: http://tinyurl.com/cnqzs3o
MAC Soft & Gentle: http://tinyurl.com/aczpr3e
Real Techniques Contour Brush: http://tinyurl.com/crgdg3n
Clinique Smoldering Plum Blush: http://tinyurl.com/bnerq9p
Real Techniques Blush Brush: http://tinyurl.com/o7ts987
HD Brows - Vamp
Real Techniques Angled Eyebrow Brush: http://tinyurl.com/cbqjftu
Art Deco EyeShadow Primer: http://tinyurl.com/q4338o4
Urban Decay Oz Great & Powerful White Shade - Limited Edition 
Real Techniques Base Shadow Brush: http://tinyurl.com/cbqjftu
MAC Woodwinked: http://tinyurl.com/nn7zeyz
Real Techniques Accent Brush: http://tinyurl.com/cbqjftu
MAC Vanilla Pigment: http://tinyurl.com/86sbvwu
Sigma Precision Round - P82 Brush: http://tinyurl.com/cdezrmm
Maybelline White Eyeliner
Illamasqua Precision Ink Eyeliner - Black:http://rstyle.me/n/bn2qysh6w
Eyelash Curlers - The Vintage Cosmetics Company:http://tinyurl.com/cr6pha2
No.7 Intense Volume Mascara: http://tinyurl.com/oc4pbfd
Avon Liptstick - Flirt


Tuesday, 26 February 2013

How I Style My Hair | Enrapture Jumbo Waver

I am completely overwhelmed at the amazing response to my , there have been heaps of entries and it seems everyone wants to get their hands on a pair. So, I thought that it might be quite nice to film a little tutorial to show you guys how I achieved the look and how easy they are to use...
They are my new favourite thing and I’m loving experimenting with them and achieving different looks – I particularly love how they create a volumized ponytail.
Do you own a pair of these? I’d love to know how you style yours if so? And if not – good luck with the giveaway!! :D


Monday, 7 January 2013

FOTD: The Classic Smokey Eye. A Step by Step Tutorial! | Zoe Newlove Guest Post

Hello Guys! Before I begin this tutorial I would just like to say a massive thank you to Megan for inviting me to do this guest post.

THAAAAAAAAAAANKYOUUUUUUUUUUUUUUUU MEGAN!! So thrilled to be here :)

Being a make-up artist, I regularly get asked the question: “How do you do a smokey eye?”

There are numerous ways to create this look, and I have found that some girls panic as to whether they are doing it the “right” way. I am here to tell you there is no “right” way. No rules. No make-up bible that you have to swear by. Make-up is about having fun and experimenting. There are only guidelines, and then the rest is down to you. On that note, I thought I would take this opportunity to talk you through this timeless look, by showing you a step by step tutorial. Simple guidelines – no rules allowed ;)
Caption (Shu Uemura Shader, M.A.C 217 Blending, Nars Smudge Brush, Illamasqua Eyeliner)

OK, you will need a few things for this.

First up, brushes! Good brushes definitely help, they will become your new best friends. In this tutorial you will need a brush to apply the shadow, one for blending, an eyeliner brush and a “smudge” brush for more accurate application. If you cannot get your hands on all of these, do not worry – most eyeshadow brushes are really versatile so just find what works best for you. I even used my finger tips for part of this tutorial!
Onto make-up. Think of a smokey eye as three colours. Dark, medium light. There are many palettes now on the highstreet or in beauty halls to choose from that have ready made “smokey eye” palettes containing these three shades. If you have one of these feel free to use it. In this tutorial, I am using a selection that I just love to work with. I decided to grab from my kit:

Jemma Kidd Make-up School – Essential Smokey eye kit - “Light”
Maybelline Colour 24hr Tattoo in Immortal Charcoal – “Medium”
Urban Decay Alice and Wonderland Ltd Palette - Jabberwocky – “Dark”

I could have just gone ahead and use the Smokey Eye Kit, but instead decided just to use the lighter shades in the palette for this guide. You can use whatever you like, just remember the guidelines for a Classic Smokey Eye are greys and blacks, and select three colours in a range of dark to light. You also need mascara, a selection of dark eyeliners and you may like me choose to use an eye primer.

I used:

Urban Decay Eyeshadow Primer Potion in Original
Laura Mercier Onyx Brilliant Gel Liner
Maybelline Eye Studio Lasting Drama Gel Liner
A Clinique Mascara
Step One:

Apologies for the naked face, but you need a blank canvas. Yes, that is right we are doing the eyes first. Why? If you make a mistake, or eye shadow powder falls onto your base it will look messy and be difficult to fix, so start your eyes first and then do your base. Apply eye primer and here I also like to fill in my brows.
Next, take your black liner (pencil or gel – personal preference) and then line the inside of your eyes, both the top and bottom water line. This will really make your eyes pop.

Step Two

Apply your medium shade to your lid. I used the Maybelline Colour Tattoo here, applying it all over the lid with the flat shader brush. Build up the colour to create depth. Take your blending brush, and going backwards and forwards along the crease really buff the colour into your socket line. If you are using this cream eyeshadow, I suggest you work with the product quickly as I find it sets really fast. Keep blending and blending along the crease, into your socket and slightly below your brow bone.
Do this until you are happy and there is no “line”. A soft finish is much better than having a harsh line.
Take this colour under your water line, use a cotton bud to neaten up any edges when you do this, as you may find the line you create is too thick.
Step Three

Time for some definition. Take your dark shade, preferably a black, or like mine one with a little bit of glitter in. Apply with a smaller brush, as suggested a “smudge” brush and tap off excess powder or apply to your hand first. This is important as you do not want to make a black mess.
Use the dark shade to create this V shape. On the top of your lid start from the outer corner of the crease and sweep towards the centre then stop. Then, still on top of your lid go from the outer corner of the lash line and line the top of your lashes, stopping just before the centre. Blend the dark and the medium together here slightly. You will also need to line underneath the lower lash line with this dark shade – use the picture above as your guide.

Hopefully, you can now see your Classic Smokey Eye coming together.
Use the above picture here for a guideline, this is how your eyes should be looking. We all have
different shaped eyes so do not panic if the shape is not the same, but you get the idea.
Nearly there ;)

Step Four

Highlighting is next. Take your light shade and using a finger or a clean brush dab the lighter shade into the inner corner of your eye and sweep along the brow bone. I like to blend the edges together too.
Ok, we are at the final stage now guys! Using the same liner as before, or like me, choose a slightly different shade – I chose one with more shimmer – line the top lash line. Give yourself a flick or just keep it simple, all we are doing is adding that tiny bit more definition. Give your lashes a good curl and wack on lots of your favourite black mascara.
Are you happy? If so clean up any mess with a cotton bud and then apply the rest of your base, contour and lip as normal.

That is it! Follow these guidelines, practice and do not be afraid to blend!

I truly hoped this post has helped you guys. If you have any questions, or would like to see more posts like this then please get in touch.

Zoe xx
http://www.zoenewlove.com/


Sunday, 16 December 2012

My Christmas Party Make Up Routine

Happy Sunday my lovelies! 
This weekend has been a rather fab one. Friday I received my Photography course results and passed with Distinction! I was so happy I definitely did a little dance at work. I worked my little tooshy off to get a good final project so I'm really happy that I managed to get the grade I did.
I also received my first feature in a local magazine about Wonderful You - a three page spread! I KNOW - I nearly died. I think I'll pop a little post up showing you guys, that's if you want to see it :)
Lastly - I went out on Friday night and used an old handbag that's been gathering dust over the past few months. It only had a bloomin' £10 note in it! (it's the small things, eh?)

Anyway - following on from my mum's birthday party a few weeks ago, I got a few questions on my make-up for the evening....
I thought I would film a little video on how I wore it that night. I've been in hiding from YouTube for a while. My skin has gone mental again so I've felt a bit self conscious, it's still not great but i've decided to just suck it up :)

Hope you enjoy and have all had a wonderful weekend! 


Wednesday, 28 November 2012

How I Style My Hair | Curly Girly

I’m the girl who finds a style she likes and tends to stick with it for about 50 years before she tries something new. Loose curls have been my ‘staple’ for the past year or so and I don’t think that’s going to change any time soon (approx 49 years remaining). Having reasonably long hair, you’d think it would take an age to curl it all but it really doesn’t. I can be styled, sprayed and ready to go in less than 20 minutes. That’s pretty speedy in my eyes (at least I hope it is?!)

Whenever my ‘face’ is in a post (typically outfit ones) you lovely lot always seem to comment on my messy mop – so I thought you might quite like to see my current styling routine?
I’ve always been passionate about beauty, but I must admit it’s only since I’ve started blogging that I’ve really taken an interest in different hair products. Up until recently, my Moroccan Oil was my only luxury product. Well it was pretty much the only product I used aside from shampoo and conditioner.  

So in terms of protecting my hair from heat or using finishing sprays I wasn’t really fussed – I always thought, my hair looks alright without any products what’s the point? But when ghd sent me over their lovely little Style and Protect gift set I couldn’t resist giving it a whirl.
STEP 1: Brush through the hair - getting rid of any knots and tangles.
STEP 2: Spray a light mist of ghd's Straight & Smooth all over the hair.
STEP 3: Split the hair down the middle and secure with two clips.
STEP 4: Curl one section - I mix it up and curl some pieces towards my face and others away. This helps to create more volume. I use my enrapture totem styler on settings 2-2-1 - this creates loose wavy curls.
STEP 5: Curl the other side, following the same steps as the previous section.
STEP 6: Apply ghd's Final Shine spray all over the hair (don't spray too hard as you only need a little bit to achieve best results!)
STEP 7: Voila! You're done :D (One last thing - I do usually run my hands through the curls quickly to loosen them slightly :))
C/O Hairstyles from ghd
To be honest, I'm pretty bowled over by the results and I was really wrong about thinking my hair looked ‘fine’ without using any other products. Using the protecting spray on blow dried hair before using my curlers means I have no fly-aways and the whole look is far smoother and sleeker. The final shine spray acts like a sort of glossy hair spray. My entire head almost glistens and it holds my curls like there's no tomorrow. I woke up the next morning and my hair looked pretty much the same - no hairspray used - nada. Very impressed. And don't even get me started on the scent! It's actually heavenly. 
The paddle brush and clips are a lovely added touch to the set. I'm particularly fond of the brush - it doesn't pull on my knots and de-tangled beautifully. 

I suppose the moral of this post is - you don't know unless you try and I'm definitely going to be experimenting with my hair care going forward - I might even buy this set for a few family members, it's amazing value for money at £39!

Do any of you scrummy lot have some products you'd recommend? I'm quite keen to try out some salt spray...?


Wednesday, 7 November 2012

This is Halloween | The Corpse Bride


Last weekend consisted of a belated Halloween Party at my friends apartment. As you can see, she looks rather marvellous and I look down right hideous - but when in Rome and all that jazz. (Right?) 
I had such a fun time getting ready and just HAD to show you the wig (I think this particular one is out of stock now, but there's one very similar available here!). I don't know if you've seen, but over the past month or so I've been filming a few videos on another channel - Annabelle's Wigs, showing ladies various tutorials and how to's on their fab wigs / hair pieces. If you want to have a nose you can do so .

Anyway, back to the outfit! I am a huge fan of Tim Burton (Nightmare Before Christmas being my all time fave movie). So it seemed obvious for me to go as one of his characters! I dressed up as The Corpse Bride and did the following to achieve my look:

  1. I applied Stargazer White Foundation to my whole face using the Real Techniques buffing brush. This foundation is SO cheap and I feel probably a little bit kinder to your skin than face paint. 
  2. Using the Real Techniques Blush Brush I lightly dusted my face with a dark blue shade from the MUA Starry Night Palette
  3. Then, using a random eye shadow brush I contoured the curves of my skull / face i.e. eye sockets, temples, cheekbones and collar bone with the MUA palette focusing on the darker shades of blue and black.  
  4. I then used the same darker shades on my eyes covering the lid in blue and hollowing out around the edges with black. I applied my usual liquid black winged eyeliner (video on how to do this ), pencil black eyeliner to the waterline and drew false eye lashes on to my eye lids with the liquid eyeliner to give the illusion of larger eyelashes. To finish the eyes I applied my false eyelashes (eyelure) and coated with thick black mascara. 
  5. To complete the makeup I used black pencil eyeliner to fill in my brows, flicking them up in the center to give the impression of being sad, and filled in my lips with the Revlon Lip Stain in Crush, adding a touch of black eye shadow to the creases of the lips.
  6. I popped on my wig and Crown and Glory customised headband and was good to go!

It took me about half an hour to do and I was quite pleased with the results :)

What do you think? And what did you dress up as on Halloween?


Friday, 27 July 2012

Messy Up Do | Bun Tutorial | Video #5

Wahooooo, it’s Friday! I don’t know about anyone else, but how bloomin’ long has this week been?! I haven’t looked forward to a weekend so much in a long time. 

Anyway, here’s video #5 for ya’ll. It’s my first tutorial, so be kind. I felt a bit silly doing it, but every time I film a video I always ask at the end if anyone fancies seeing anything in particular, & the only thing that’s ever asked is ‘please can you do a bun tutorial’. There’s got to be over a million & one videos of girlies showing you how they achieve this look, but for some reason you guys wanted to see mine....
So, without further ado *inserts drum roll* here it is….me looking like a complete plonker in front of the camera :) 


Haha, hope I don't look like too much of a fool!! 
Have you lovely lot got much on this weekend? I’m keeping my fingers crossed the sun keeps on shining! 

Older Posts Home